Difference between revisions of "Server Browser"
Vectrex720 (talk | contribs) m (Changed a word) |
m (Categorized Page) |
||
| (12 intermediate revisions by 3 users not shown) | |||
| Line 1: | Line 1: | ||
| + | [[Category: Intruder]] | ||
==About== | ==About== | ||
| − | Players use the | + | Players use the [[Server Browser]] to navigate between servers and custom lobbies. |
==How to use== | ==How to use== | ||
| + | Once the user has navigated to the [[Server Browser]], they may view the active servers. To join a server, click on the name of the server, and then the join button in the bottom right. To create a custom server, click the create server button next to the join button on the bottom left. Select map(s) for the map pool by using the check boxes, whether [[Demoted]] players or [[Hats]] are allowed, and a password is optional. | ||
| − | + | ==Creating a Server== | |
| + | Once the user has navigated to the '''Create Room''' Page, they may: | ||
| + | |||
| + | • Choose which [[maps]] will be available for play ''(Left Checkboxes)'' | ||
| + | • Choose which [[map]] the server will start on ''(White box)'' | ||
| + | • Set a Password | ||
| + | • Allow [[Hats]] or [[Demoted]] Players | ||
| + | • Enable/Disable Match mode | ||
| + | • Turn on Tuning ''(Scripts)'' | ||
| + | |||
| + | Just press '''Create''' once done changing settings to play. | ||
| + | |||
| + | ''Create server screen as of Unity 5 Version 79:'' | ||
| + | |||
| + | [[File:Create Server.png|800px]] | ||
==History== | ==History== | ||
| + | The [[Server Browser]] has been through several iterations. | ||
| + | |||
| + | |||
| + | |||
| + | The server browser as of Unity 5 version 79 | ||
| + | |||
| + | [[File:Intruder Browser Version 79.png|800px]] | ||
| + | |||
| + | |||
| + | The server browser as of Unity 5 version 76 | ||
| + | |||
| + | [[File:Intruder Browser Version 76.png|800px]] | ||
| − | |||
The classic Unity 4 server browser | The classic Unity 4 server browser | ||
| Line 14: | Line 41: | ||
[[File:Classic Intruder Browser.png|800px]] | [[File:Classic Intruder Browser.png|800px]] | ||
| − | |||
| − | [[File:Intruder Browser | + | Server browser as of Feb. 2014 |
| + | |||
| + | [[File:Intruder Browser Feb 2014.png|800px]] | ||
Latest revision as of 23:20, 12 May 2018
About
Players use the Server Browser to navigate between servers and custom lobbies.
How to use
Once the user has navigated to the Server Browser, they may view the active servers. To join a server, click on the name of the server, and then the join button in the bottom right. To create a custom server, click the create server button next to the join button on the bottom left. Select map(s) for the map pool by using the check boxes, whether Demoted players or Hats are allowed, and a password is optional.
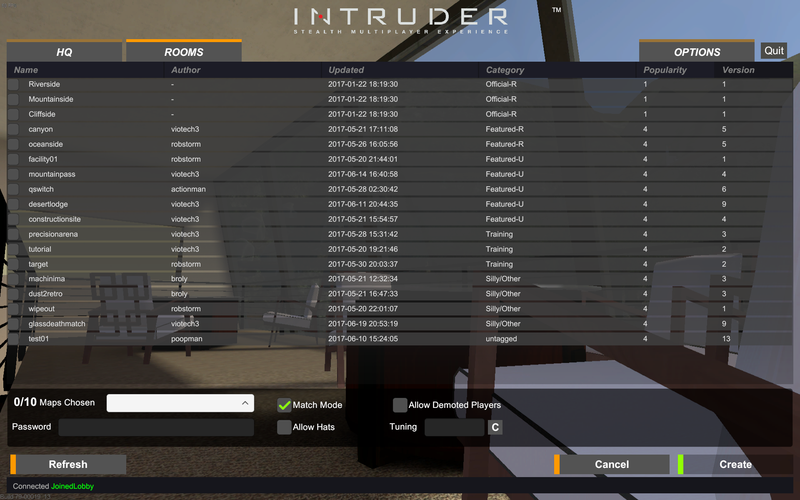
Creating a Server
Once the user has navigated to the Create Room Page, they may:
    • Choose which maps will be available for play (Left Checkboxes)
    • Choose which map the server will start on (White box)
    • Set a Password
    • Allow Hats or Demoted Players
    • Enable/Disable Match mode
    • Turn on Tuning (Scripts)
Just press Create once done changing settings to play.
Create server screen as of Unity 5 Version 79:
History
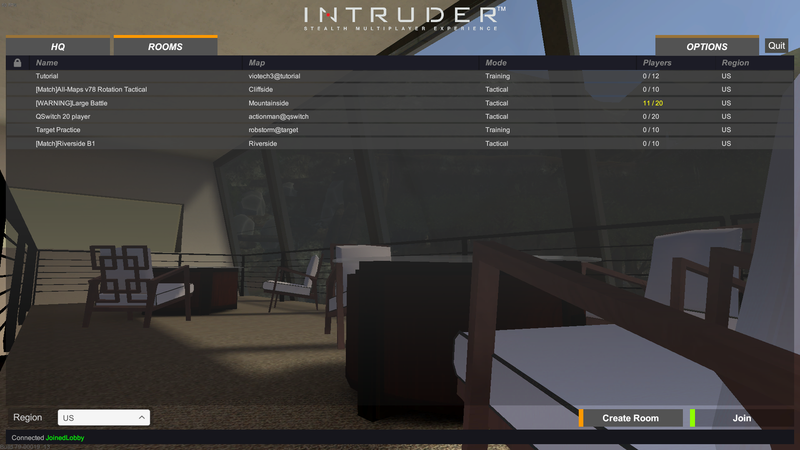
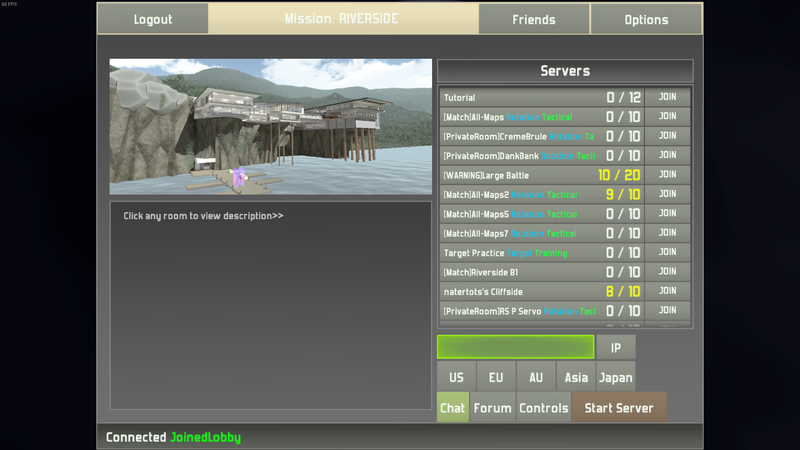
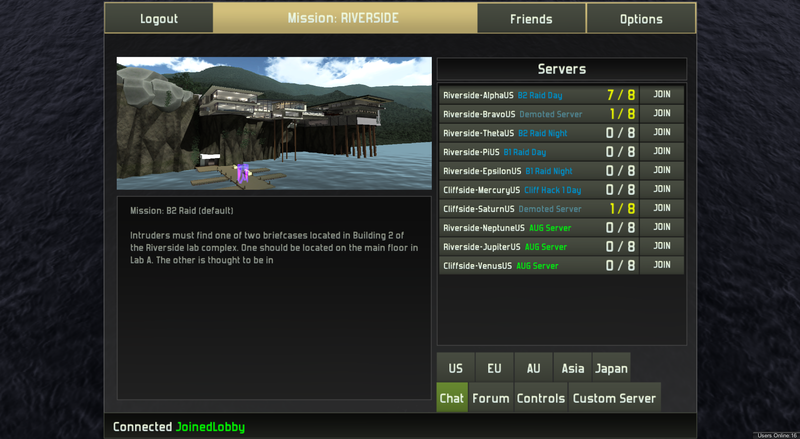
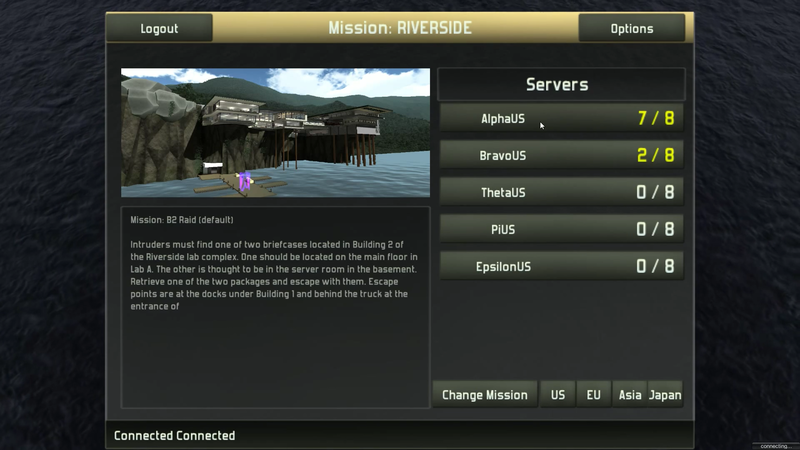
The Server Browser has been through several iterations.
The server browser as of Unity 5 version 79
The server browser as of Unity 5 version 76
The classic Unity 4 server browser
Server browser as of Feb. 2014
