Difference between revisions of "IntruderMM"
m (Corrected the download link for Sonic1764's Easy Build Tile Kit which was erroneously a duplicate of ActionMan's Heatwave shimmer download link.) |
|||
| (7 intermediate revisions by 3 users not shown) | |||
| Line 1: | Line 1: | ||
| − | + | = Overview = | |
| + | The [[Intruder]] Map Maker (or [[IntruderMM]]) is used to create [[custom maps]] for [[Intruder]] through Unity3D. These custom maps can then be uploaded to the steam workshop to be shared amongst users. Included in the IntruderMM package is a large array of [[Template:IntruderMM Assets |tools and prefabs]] which allow users to customize the layout and gameplay mechanics of their map. | ||
| + | <!--The following link is redundant, as all information present there is also on this page with more information.--> | ||
| + | <!--:*A page for how to set up [[IntruderMM]], including tools, props, and textures to help with creating a map: [https://sharklootgilt.superbossgames.com/wiki/index.php?title=Mapmaker_resources Intruder Map Maker Resources]--> | ||
| − | + | = Creating a Map = | |
| + | In order to begin creating a custom map, users will need two items: | ||
| − | :* | + | 1. Unity {{IntruderMMUnityVersion}} via Unity Hub''' |
| + | ::*'''Unity Hub Download''': https://unity3d.com/get-unity/download | ||
| + | ::*You '''MUST''' install version {{IntruderMMUnityVersion}} or earlier or you will not be able to launch your map | ||
| + | ::*If it is not listed in the Unity Hub application, you can find {{IntruderMMUnityVersion}} in the Unity Download Archive: https://unity.com/releases/editor/archive | ||
| + | ::**You '''MUST''' make sure to install both Windows and Mac build platforms! | ||
| − | = | + | 2. Intruder MM Unity package {{IntruderMMVersion}} |
| + | :::*'''Google Drive Download''': https://drive.google.com/drive/folders/0B8N1PnL3QcxtWW85eXhtWFFmWWM?resourcekey=0-vllq8UVBE4IYOaqBx4W5_w | ||
| + | :::*Intruder MM {{IntruderMMVersion}} is '''NECESSARY''' for Steam Workshop version and Unity {{IntruderMMUnityVersion}} | ||
| − | + | == Getting Started == | |
| − | |||
| − | |||
| − | |||
| − | |||
| − | + | === Unity Installation === | |
| − | : | + | :To begin, install [https://unity3d.com/get-unity/download Unity Hub] to your computer. After the installation is complete, open Unity Hub and click "Add" from the installs section. Choose Unity {{IntruderMMUnityVersion}} from the list to begin the installation process. If the version is not listed, you are able access it on the [https://unity.com/releases/editor/archive Unity Archives] webpage. |
| + | ::'''Note:''' Make sure to install both Windows and Mac builds! These options are available after starting the installation process. A window will appear allowing you to select installation packages; ensure that Windows and Mac builds are selected before proceeding! | ||
| − | == | + | === Importing IntruderMM === |
| − | + | :After installing the correct Unity version, start a new project. Make sure the path to the project has no spaces in it, (e.g. C:/UnityProjects/MyMap instead of C:/My Documents/Intruder Map) or else you won't be able to export and test or upload the map. Now, import the IntruderMM Unity package to your opened project. This will set you up with everything you need to start making your level. Just double click the package when you have your project open and it will begin importing it into your project directory. Alternatively, you can use the dropdown on the top toolbar to import it (Assets->Import Package->Custom Package). | |
| − | + | === Creating Your Map === | |
| − | = | + | :Now that the package is imported, you are able to start making your level! Make sure to grab a [[SpawnA]] and [[SpawnB]] from the IntruderMM Prefabs folder and place them in your level to choose where your guards and intruders will spawn. The prefabs folder is full of great things to get your levels started such as [[doors]], windows, [[GoalPointProxy|goal points]], [[briefcase|briefcases]], and more. |
| + | ::To add doors, you'll need to download the Superboss Doors package, which can be found in the same [https://drive.google.com/drive/folders/0B8N1PnL3QcxtWW85eXhtWFFmWWM?resourcekey=0-vllq8UVBE4IYOaqBx4W5_w google drive] as the MM package. The package is imported the same as the MM package, and once you have it in your project you can place the prefabs in your level wherever you need them. | ||
| + | :Because we are using Unity as the editor, you have control over all of its level editing power. This means that you are able to use any tool or resource available to you, aside from creating custom scripts. Despite this, you are able to access [[Activator|Activators]] which can be used to create complicated map mechanics, such as teleporters, timed spawns, traps, and more. | ||
| − | + | === Playtesting === | |
| − | : | + | :As you are creating your level, you are able to playtest the map in-game to get a feel for how players will use it. To test your map, you can either use the Intruder menu at the top toolbar, or by pressing the "Test Map" button at the bottom right of the view-finder. If it is the first time you are testing the map, Unity will ask you to locate your copy of Intruder.exe or Intruder.App. After you select the file (where Steam stores the Intruder app), it will launch the level inside of Intruder so you can test it out offline! |
| − | === | + | === Uploading your map === |
| − | : | + | :Once you are satisfied with your map or would like to test it with others, you may upload it to the steam workshop for anyone to download. Open the "Intruder" tab in the top toolbar and press "Map Upload" to open the options window to begin the upload process. If it's the first time uploading the map, leave the Workshop ID blank. Otherwise, you can grab the Workshop ID from the URL of the map you want to Update. |
| − | |||
| − | |||
| − | |||
| − | |||
| − | |||
| − | |||
| − | |||
| − | |||
| − | |||
| − | |||
| − | |||
| − | |||
| − | |||
| − | |||
| − | |||
| − | |||
| − | |||
| − | |||
| − | |||
| − | |||
| − | |||
| − | |||
== Rules == | == Rules == | ||
| Line 65: | Line 52: | ||
= Resources = | = Resources = | ||
== Official Resources == | == Official Resources == | ||
| − | Superboss Games have provided the map-making community with a bunch of assets that greatly aid with the development of maps. | + | Superboss Games have provided the map-making community with a bunch of assets that greatly aid with the development of maps. A large number of these can be found inside the IntruderMM package by default in the form of [[Template:IntruderMM Assets | prefabs and scripts]], but there are more available for download in the MM google drive: |
{| class="wikitable" | {| class="wikitable" | ||
! colspan="1" | Name | ! colspan="1" | Name | ||
| Line 79: | Line 66: | ||
|[https://drive.google.com/drive/folders/0B8N1PnL3QcxtWW85eXhtWFFmWWM?resourcekey=0-vllq8UVBE4IYOaqBx4W5_w Download] | |[https://drive.google.com/drive/folders/0B8N1PnL3QcxtWW85eXhtWFFmWWM?resourcekey=0-vllq8UVBE4IYOaqBx4W5_w Download] | ||
|} | |} | ||
| − | |||
== Community Resources == | == Community Resources == | ||
| Line 118: | Line 104: | ||
| Easy Build Tile Kit | | Easy Build Tile Kit | ||
| - | | - | ||
| − | | [https://drive.google.com/file/d/ | + | | [https://drive.google.com/file/d/1cNsQ9ww-WwRTEMmGfgp8VACXgK22oBTo/view Download]<br/>[https://www.youtube.com/watch?v=qpA1IE7Jyuc Video Tutorial] |
|- | |- | ||
| Line 132: | Line 118: | ||
| Black mesa themed HECU skins | | Black mesa themed HECU skins | ||
| [[File:VortexHECUGuardSkins.png|thumb]] | | [[File:VortexHECUGuardSkins.png|thumb]] | ||
| − | | [https://drive.google.com/file/d/ | + | | [https://drive.google.com/file/d/1S84i_fGedtTcReSC2tcmWgSUy9y8Cpio/view?usp=sharing Download] |
|- | |- | ||
| Line 264: | Line 250: | ||
| ActionMan | | ActionMan | ||
| Materials/ Objects | | Materials/ Objects | ||
| − | | Sonar Materials (Batman pack) | + | | Team-specific Sonar Materials (Batman pack) + Team-specific NVG + Digital clock countdown objective |
| − | | | + | | [[File:Sonar.png|thumb]] |
| [https://cdn.discordapp.com/attachments/822272089314557953/1115145246200840253/Sonar_Materials_2023-06-05.unitypackage Download] | | [https://cdn.discordapp.com/attachments/822272089314557953/1115145246200840253/Sonar_Materials_2023-06-05.unitypackage Download] | ||
| Line 299: | Line 285: | ||
| Paid | | Paid | ||
| Lightmapping | | Lightmapping | ||
| − | | Bakery is a lightmapping plugin that allows the utilization of the GPU. This plugin requires a modern Nvidia GPU (6xx or newer) and 64-bit Windows (7 or higher). | + | | Bakery is a lightmapping plugin that allows the utilization of the GPU. This plugin requires a modern Nvidia GPU (6xx or newer) and 64-bit Windows (7 or higher). From time to time it goes into a 50% discount. |
| [https://assetstore.unity.com/packages/tools/level-design/bakery-gpu-lightmapper-122218 Asset Store] | | [https://assetstore.unity.com/packages/tools/level-design/bakery-gpu-lightmapper-122218 Asset Store] | ||
[https://geom.io/bakery/wiki/index.php?title=Bakery_-_GPU_Lightmapper Wiki] | [https://geom.io/bakery/wiki/index.php?title=Bakery_-_GPU_Lightmapper Wiki] | ||
Latest revision as of 02:06, 10 January 2024
Overview
The Intruder Map Maker (or IntruderMM) is used to create custom maps for Intruder through Unity3D. These custom maps can then be uploaded to the steam workshop to be shared amongst users. Included in the IntruderMM package is a large array of tools and prefabs which allow users to customize the layout and gameplay mechanics of their map.
Creating a Map
In order to begin creating a custom map, users will need two items:
1. Unity 2020.3.48f1 via Unity Hub
- Unity Hub Download: https://unity3d.com/get-unity/download
- You MUST install version 2020.3.48f1 or earlier or you will not be able to launch your map
- If it is not listed in the Unity Hub application, you can find 2020.3.48f1 in the Unity Download Archive: https://unity.com/releases/editor/archive
- You MUST make sure to install both Windows and Mac build platforms!
2. Intruder MM Unity package 2.22
- Google Drive Download: https://drive.google.com/drive/folders/0B8N1PnL3QcxtWW85eXhtWFFmWWM?resourcekey=0-vllq8UVBE4IYOaqBx4W5_w
- Intruder MM 2.22 is NECESSARY for Steam Workshop version and Unity 2020.3.48f1
Getting Started
Unity Installation
- To begin, install Unity Hub to your computer. After the installation is complete, open Unity Hub and click "Add" from the installs section. Choose Unity 2020.3.48f1 from the list to begin the installation process. If the version is not listed, you are able access it on the Unity Archives webpage.
- Note: Make sure to install both Windows and Mac builds! These options are available after starting the installation process. A window will appear allowing you to select installation packages; ensure that Windows and Mac builds are selected before proceeding!
Importing IntruderMM
- After installing the correct Unity version, start a new project. Make sure the path to the project has no spaces in it, (e.g. C:/UnityProjects/MyMap instead of C:/My Documents/Intruder Map) or else you won't be able to export and test or upload the map. Now, import the IntruderMM Unity package to your opened project. This will set you up with everything you need to start making your level. Just double click the package when you have your project open and it will begin importing it into your project directory. Alternatively, you can use the dropdown on the top toolbar to import it (Assets->Import Package->Custom Package).
Creating Your Map
- Now that the package is imported, you are able to start making your level! Make sure to grab a SpawnA and SpawnB from the IntruderMM Prefabs folder and place them in your level to choose where your guards and intruders will spawn. The prefabs folder is full of great things to get your levels started such as doors, windows, goal points, briefcases, and more.
- To add doors, you'll need to download the Superboss Doors package, which can be found in the same google drive as the MM package. The package is imported the same as the MM package, and once you have it in your project you can place the prefabs in your level wherever you need them.
- Because we are using Unity as the editor, you have control over all of its level editing power. This means that you are able to use any tool or resource available to you, aside from creating custom scripts. Despite this, you are able to access Activators which can be used to create complicated map mechanics, such as teleporters, timed spawns, traps, and more.
Playtesting
- As you are creating your level, you are able to playtest the map in-game to get a feel for how players will use it. To test your map, you can either use the Intruder menu at the top toolbar, or by pressing the "Test Map" button at the bottom right of the view-finder. If it is the first time you are testing the map, Unity will ask you to locate your copy of Intruder.exe or Intruder.App. After you select the file (where Steam stores the Intruder app), it will launch the level inside of Intruder so you can test it out offline!
Uploading your map
- Once you are satisfied with your map or would like to test it with others, you may upload it to the steam workshop for anyone to download. Open the "Intruder" tab in the top toolbar and press "Map Upload" to open the options window to begin the upload process. If it's the first time uploading the map, leave the Workshop ID blank. Otherwise, you can grab the Workshop ID from the URL of the map you want to Update.
Rules
Levels with offensive or copyrighted material may be removed from the Workshop level list at the discretion of Superboss Games. If you frequently upload material which is unsuitable, your account may be cut off from ever uploading levels again.
More
Make sure to join the Discord Server for more help using the IntruderMM: https://discordapp.com/invite/superbossgames
Resources
Official Resources
Superboss Games have provided the map-making community with a bunch of assets that greatly aid with the development of maps. A large number of these can be found inside the IntruderMM package by default in the form of prefabs and scripts, but there are more available for download in the MM google drive:
| Name | Usage | Download |
|---|---|---|
| Player Models | The player models are useful to get the right proportion and height of your maps, resulting in a better looking and feeling map. I would recommend downloading the player skins package is well to put materials on the player model in unity and to make sure the player models don't get in the way of players in-game, make sure to use the EditorOnly tag on them. | Download |
| Door Package | The Door Package allows map makers to use the doors found in the official maps. | Download |
Community Resources
The community has made many props and prefabs that are free to share and reuse in your own maps. Some are listed here.
| Made by | Type | Description | Preview | Links |
|---|---|---|---|---|
| Neildmac | Guide | Intruder Mapmaking SuperGuide | - | Read |
| Polybius | Level Design prefabs and Art | Many different game objects such as doors, keypads, plants, buttons, weapon boxes, and more. | - | Download |
| Polybius | Objects | Pack of doors made by Polybius | Download | |
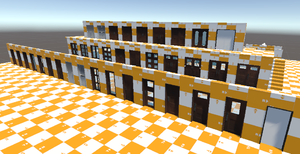
| Sonic1764 | Tile Kit | Easy Build Tile Kit | - | Download Video Tutorial |
| SpooKy | Game objects | Map Accessories | - | Download |
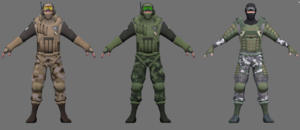
| Vortex | Player skins | Black mesa themed HECU skins | Download | |
| Xixo | Object | Untextured draggable curtains ala old Oceanside | - | Download |
| ActionMan | Game objects | ActionMan's Reprisal Vents | - | Download |
| ActionMan | Material | Fix for unity for textures.com's Wire Fence Textures | - | Download |
| ActionMan | Material | Dirty mirror material | - | Download |
| ActionMan | Material | 3D text material | - | Download |
| ActionMan | Material | Pack of textures used in Reprisal (From textures.com, converted for Unity) | - | Download |
| ActionMan | Material | Zone that blurs your screen when you're inside of it | - | Download |
| ActionMan | Template | Train level template | - | Download |
| ActionMan | Material | Material that is invisible until you get close to it | - | Download |
| ActionMan | Object | Reprisal's gateway van (Animation example) | - | Download |
| ActionMan | Object | Reprisal's helicopter (Animation example) | - | Download |
| ActionMan | Object | Elevator that stops at 5 floors with a minimal number of animations to tweak | - | Download
|
| ActionMan | Object | Shootable garden lights | - | Download |
| ActionMan | Object | Animated clouds | - | Download |
| ActionMan | Object | Drivable APC (warning: this object massively desyncs) | - | Download |
| ActionMan | Object | LandMine from Trapmania | - | Download |
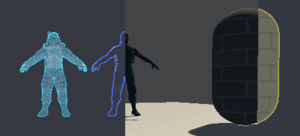
| ActionMan | Object/Zone | Heatwave shimmer for your hot places | Download | |
| ActionMan | Object | QSwitch's lasers | - | Download |
| ActionMan | Materials/ Objects | Team-specific Sonar Materials (Batman pack) + Team-specific NVG + Digital clock countdown objective | Download |
Unity Plugins
These plugins can greatly improve your workflow for level design, shader development, and lighting! Make sure to put these in a folder named Plugins from the root directory of the assets folder or else they will highly likely not work.
| Name | Price | Type | Description | Links |
|---|---|---|---|---|
| SabreCSG | Free | Level Design | Most popular Level Editing Plugin in the community, due to it being free, open-source and easy to use. SabreCSG allows users to make maps using brush geometry similar to editors such as Source SDK Hammer. SabreCSG is included in the MapMaker package, so you don't need to download or import any other version. | |
| RealtimeCSG | Free | Level Design | RealtimeCSG is the Realtime equivalent of SabreCSG only less accurate and doesn't break all the time. It's a bit tricky to install, you have to extract all the contents then only grab the RealtimeCSG/Assets/Plugins/RealtimeCSG folder then drag that into the Plugins folder you made before to install plugins. RealtimeCSG allows users to make maps using brush geometry similar to editors such as Source SDK Hammer in Realtime. | Download |
| Bakery | Paid | Lightmapping | Bakery is a lightmapping plugin that allows the utilization of the GPU. This plugin requires a modern Nvidia GPU (6xx or newer) and 64-bit Windows (7 or higher). From time to time it goes into a 50% discount. | Asset Store |


